1.2m CCD Realtime System Primer

AndyCam Version

Creation: July 22, 1993 by Nelson Caldwell caldwell@flwo99.sao.arizona.edu
HTML version Creation: Feb. 24, 1994 by Bill Wyatt wyatt@cfa.harvard.edu
Latest HTML version : Mar 16, 2002 by EF

When you see this  (back arrow) icon, you can click on it to return to this point.

Table Of Contents

Click on the section below you wish to read, or scroll down


Introduction

This primer is intended to instruct new users of the CCD system on the 1.2-meter telescope. As such, many of the features of both the Realtime system and the Unix operating system itself will not be discussed unless they are essential to the taking or archiving of data. There are or will be other manuals for the operation of the telescope itself and of the irarray. Be advised that this system is subject to change, and many changes might have occurred since you last used it. This primer will concentrate on what can be done by one particular user, namely the "observer". We try to keep this one computer account unchanged. If you make minor changes please advise us. The observer account is restored periodically from a frozen tape version. If you don't like its setup, or wish to make lasting changes, please ask for your own account.

 (back arrow) To Table Of Contents


Getting Started

Log in to the Sun computer named flwo48. using the name ``observer''. Please consult the printed documentation for the password. You will soon see several windows appear, including a blue one called Main Login, a red one called Iraf, a clock, and the TWM Icon Manager. The blue and red windows at this point are simply unix xterm windows.

At this point, you need to learn how to use the mouse. It has three buttons: left, middle and center, which are almost always used in conjunction with the diamond key at the bottom left or right of the keyboard. The mouse serves many functions, only two of which will be described here.

First, the location of the mouse directs keyboard characters to the appropriate window. This is done simply by placing the mouse cursor (looks like a capital I) in the window you want to work in. Often if nothing happened after you typed a command, it is because the mouse was not in the right window. Second, when used with the diamond key, the mouse can be used to move or resize the window that the mouse is in. Here are some of the things you can do, although you should experiment around with the mouse in order to really understand it. The following are all done with the diamond key held down.

left mouse button
When clicked on and off while in the main part of the window, the window will be lowered.
center mouse button
Resize the window, also raises it
right mouse button
Move the window, also raises it.
At the top margin of each window is a bar; clicking a mouse button there will do some different things (you don't need the diamond key):

In the barred area at top:

 (back arrow) To Table Of Contents


Taking Data

First, the telescope PC must be working, as well as the guide PC. To start these up, go to
Startup and TCS.

To start the ccd program, move the mouse to the Main Login window and type

gotccd
Three windows will appear:
  1. The Monitor Window (labeled tinst.setup)
  2. The Rtshell Window
  3. The TCS Window (Telescope Control System Window)
You only need the monitor window for debug output when problems occur, so iconify it for now. This will soon be displayed inside the tcs window.

The Rtshell window accepts commands for the Realtime System control of the CCD. It has the functions of the tcsh (command line editing) as well as some custom functions. It also has commands built in to control the telescope, filter positions and guider functions, which duplicate many of the TCS functions.

Next, you should decide what ccd format you want, i.e. binned 2x2 or unbinned. The binned pixels are about .6" on the sky while the unbinned are of course half that. The telescope is capable of giving subarcsecond images, which would be degraded by the binned pixel size. However if good images are not essential, the smaller data size and quicker readout of the binned images may be appealing.

Click here for more info on the CCD Chip

In the rtshell window, type small, which is an alias for ccd program off, and will result in binned 2x2, Or type large, which is an alias for ccd program serial parallel and will result in full resolution. Small is executed by default on startup.
One of these commands is contained in a file called ``.ccd.rtrc'' in the observer home directory an is executed when you typed gotccd . If you want a different size at startup, edit that file and change commands. This will insure that every time you exit and return to the system the size will be the same. You can always enter the binning commands in the Rtshell window.
The next, decide what output data format you want for disk storage. The two choices are ccd filetype iraf or ccd filetype fits. One of these is also contained in the .ccd.rtrc file, and you should likewise make sure it is the command you want. With no command the system defaults to FITS files. Use of the FITS format is discussed at the end of this document.

Once an iraf file is stored, the header can only be modified using the IRAF command hedit filename keyword, or by using oldcom filenumber with fits files. The frames are stored in a directory named like /ccd/flwo2/year/month/day, for example /ccd/flwo2/1992/01/03 for Jan 3, 1992. The directory changes at noon MST.

There are thankfully only a few commands you need to know to take an exposure:

obs
Prompts for a title, and an exposure time (in seconds or sexagismal (mm:ss)). Will do a fast clear of the CCD, open the shutter, read out the CCD and store the data. Information contained in the comment block is automatically store in the data header.
total n
Will do a fast clear of the CCD, open the shutter for time n, where n can be seconds, or sexagismal (mm:ss), read out the CCD and store the data. No prompt will be made for comments - you must enter a name via "object" or "comments," otherwise file is named "unnamed". Total can also be used to change the exposure time in the middle of one already in progress.
bias n
Takes n zero-second exposures and names them ``BIAS''.
godark [ n ]
Same as total except the shutter isn't opened. The exposure is named ``DARK''.
goflat [ n ]
Takes an exposure of length n, calls it ``Flat'', and notes in the header that the exposure is a calibration flat field.
mtotal m
Like total, but for integer minute exposures.
go [ n ]
Does a fast camera clear, open the shutter for optional time n, or forever with no time. A total time may later be entered via the total n command. The shutter will close at the end of time, No storage occurs, so this works for multiple exposure frames.
stop
Closes the shutter; no readout.
dstore
Reads out the CCD and stores the image on disk. The comment field must have been edited.
repeat [ m ]
Repeats the last command m times. To take m+1 exposures, use the sequence total n; repeat m, all on one line. A more frequently used sequence might be goflat 3; repeat 24 to obtain 25 flat fields. The comment field should be edited beforehand, or fresh should be used. To end a sequence, type ccd norepeat.
abort
Kills an exposure, but does not clear the CCD.
kill or sac
Kills an exposure, clears the CCD. Dead.
clear
Resets status, often needed after an abort.
cc [ n ]
clears the camera (fast read) n times.
comment
puts you in the comment editor. If a change is made, the comment block is stored as comments in the disk fits header, and object goes into the fits keyword OBJECT.
fresh
uses the most recent comments for the next image
object name
gives the next file a name, puts that name in the FITS keyword OBJECT, but does not put that name in the comment field, nor does the comment field get stored in the next file, unless the comment command is also explicitly invoked.
oldcom [ n ]
Change the header information on an existing FITS file. Selects an editor from the value of the VISUAL or EDITOR shell variables, usually vi or mg. If you get the wrong editor, edit the file .cshrc in your home directory and change these variables.

 (back arrow) To Table Of Contents


Comment Editor

The comment block can be edited by typing the command comment. Here's how the comment-editing window appears:

When the window appears, move the mouse to the right side of the window where the changeable parameters are. On the 1.2m, the coordinates, airmass, times and filter are transferred from the telescope computer, so the only things you might want to enter are the object name, your name, the weather conditions, etc.

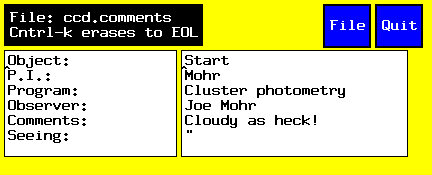
The stored frame will use the object name as a name, if one has been provided via the comment block, the command object, or by using the command obs. An object name will also be entered into the frame header if the catalog option in the TCS window has been invoked (see below and the TCS manual). If neither option has been chosen, the frame will be named unnamed, and the comment field in the header will be blank. Iraf format files can be renamed (from inside IRAF) with imrename and FITS format files can be renamed with the oldcom command in the rtshell window. The obs command automatically stores the comment block, even if hasn't been edited recently.

 (back arrow) To Table Of Contents


Telescope and Top Box Control

The TCS window allows control of the movement of the telescope, telescope focus, top box filter wheel and guider functions. It also displays the current telescope position, focus and filter position, and telescope times if the Mac communication is on (set by clicking on the Mac Comm button). For a more detailed listing of the use of this window, see the TCS manual .

Here is a sample TCS window:

Filters
Filters can only be loaded by Bas, Ted or other qualified people. To move to a particular filter, simply click the left mouse button on that filter button. The longest time required move to a filter is 15 seconds, for a 4 position move. The filter currently over detector is displayed in the TCS window. You should blow the dust off the filters using a canister of dry air before your run begins, or perhaps even every afternoon. There is an access port that makes this easy.

We have UBVRI filters in residence. Click here for a transmission curve or for a listing . Note that 2" filters will vignette at the edges of the CCD field, in a curious way that causes astigmatic star images.

Telescope Focus
Telescope focus uses a stepper motor controlled from the Sun computer by the TCS program. To change the focus, click the left mouse button on the TCS Focus Move button. A smaller window will popup with buttons for movement in or out. The movement step size can be changed with the Focus Set button. Movement to larger numbers is against gravity. Always come to the final focus position from the same direction that you used to determine that position. It is advisable to backstep in about 500 units before resuming out motions to take out backlash in the focus ram. The focus position is displayed in the TCS window, and is stored in the data header. A good script for automatically focusing the telescope is nfoc, which calls the script testfoc with arguments 8 2 15 (numframes exptime stepsize).
Slewing
Use the TCS New Coords button to enter your next position, using spaces or colons to separate h:m:s and d:m:s. The epoch may be omitted, in which case 1950.0 will be used. The coordinates may also be selected from a catalog (see the TCS manual). Once coordinates are loaded, then click on the Slew Enable button. The STOP button will abort a move or a new coords command, but hitting the cancel button on the DFM rack is faster.
Other Features:
One can also offset the telescope from the present position an arbitrary number of arcsecs, change the track rates, set the time, and basically do all of the TCS functions from the rtshell window as well as the TCS window via special commands. See the TCS manual) for details. Rtshell also allows script control of the system, see the Rtshell Users Guide and the Rtshell Script Writers Bible for further information.

 (back arrow) To Table Of Contents


Displaying Images

So now that you have taken an image, we move over to the IRAF window to look at the data. In that window, type cd; cl as usual. You will need to cd to the data directory, for example cd /ccd/flwo2/1992/01/03 A directory listing will reveal that the header and pixel files are in the same place. Type !saoimage & to bring up the display package, and click the left button. If the image sizes are 2048x2048, you will need to change the stdimage in IRAF, via set stdimage=imt2048 To display an image type displ 000n.object or whatever the name is. There are help files in the directory ~observer/saoimage.help which describe the various features. Click on saoimage's Color menu button and you will enable the lookup table, altered by holding a mouse key down and then moving the mouse. Of particular note is the n key, which will load an image in standalone mode (IRAF won't know about it), which occurs much faster than displaying through IRAF, plus the pixel values aren't truncated. The complete path name of the .imh file must be entered.

The most useful iraf package for analyzing your image is imexamine which places a cross shaped cursor on the image, allowing line and column plots (l or c keys), and radial profile plots of stars

(r key). These graphs will come up in a separate graphics window. Use q to exit imexamine. The implot package also comes in handy.

Hardcopies can be made by going to the etc menu, and clicking on print.

If for some reason another saoimage is running, IRAF will not display in the new saoimage. If you suspect this has occurred, i.e. disp doesn't seem to do anything, go to the main login window and type ps aex | grep image. Kill any processes named saoimage or ximage with command kill -9 procnumber, then try saoimage again. If it won't let you kill them (not owner), use godown to reboot.

If you are not running iraf, there are two aliases for using saoiaage, view and iview . View is for use with fits files, and is used with view [filenumber], iview is used the same way for iraf files.

 (back arrow) To Table Of Contents


Focusing

To take manual focus frame do the following:
  1. Determine the appropriate exposure time for the star and place the star in the middle of the CCD.
  2. Remove backlash by dropping mirror -500 (lower) than suspected focus.
  3. Move the focus up to 60 units prior to suspected true focus position, or +460.
  4. In the Rtshell window, type go n, where n is the exposure time.
  5. After the beep, offset the telescope about 15" west, and move the focus outward about 20 units (positive direction).
  6. type go n again. repeat 4 & 5 about six times, leave a double offset for the last exposure.
  7. for the last exposure type total m*n, where m*n is the total exposure you expect (the TCS will tell you this). If you don't want any more exposures, make m*n equal or less than the current exposure time.
  8. The chip will now be read out. You have created a multiple exposure of the star at different focus settings, which can be inspected via the imexamine routine for the best focus. Delash again, and come back up to correct focus.
To take automated focus frames: There is a script called testfoc, which is takes three arguments, numframes, exptime and stepsize. For example, testfoc 8 2 15 will produce a frame name 0002.FineFoc.imh which contains eight exposures of two seconds each, with a focus offset of 15 steps between each frame, and will then prompt the user for the number of the in-focus image and set the focus to the correct value. The command nfoc is equivalent to testfoc 8 2 15.

The telescope focus appears to change both with temperature and position in the sky.

Guider Focusing

After focusing the telescope, put the guider on-axis, then in the acquire window adjust the focus value. The guider will remember ANY change to guider focus while on-axis, and store this for use in the future. If the telescope focus was correctly set, you only need to change the on-axis guider focus once. When the telescope comes out of focus, just refocus telescope, and guider will be back to focus.


 (back arrow) To Table Of Contents


Scripts

The rtshell allows many manual commands to be automated. For instance, scripts have been written that will execute a sequence of commands that will take flat field exposures in various filters. Likewise, scripts can be written to move to a standard star and take exposures in several filters. Check the scripts subdirectory in the observer directory for sample scripts. For details on writing your own scripts, go to the Rtshell Script Writers Bible for further information.

It is not easy to kill a script, for the shell is occupied during the script and will not accept commands like "kill". Typing CNTRL-C during readout will sometimes kill each exposure individually, and thus is useful if there are only a few exposures left. Otherwise, you must kill the rtshell window (using the 3rd mouse button to bring up "Destroy Window"), and then restart the Realtime system. This problem may be avoided by putting in 5 second delays between each sequenced exposure in the script used, during which time one can type a CNTRL-C which will kill the sequence. Alas, none of the commonly used canned scripts have this feature.


 (back arrow) To Table Of Contents


Data Archiving

There are several ways to store data on tape. We recommend using the DAT 4mm tape drive because of its speed, although there is an exabyte available as well. The exabyte is less reliable. We also recommend that your store your data in FITS format, on a FITS tape, with one night per tape. This is because:
  1. Unix tar files are not necessarily transportable between different brands of computers.
  2. The IRAF header files may have absolute pointers to the pixel files, which would have to be changed once you load the data onto another machine.
  3. Using ``tar x tape'' without other arguments will create the entire directory tree on your machine, which may be too much data and too slow.
There are three basic ways to archive data:
  1. Use IRAF commands from IRAF:
    First allocate the drive with allocate mtd. (The IRAF name for the 4mm drive is mtd and the Unix name is /dev/nrst0).

    To write to a new DAT tape use wfits *.imh mtd newtape+
    To write on a tape containing files wfits *.imh mtd [eot]

    As of April 1993, writing a fits file to a DAT tape that has data on it fails unless you first write at least one file to an actual tape file number (i.e., wfits filename mtd [42]). After doing that, writing to mtd [eot] would work.
    Be sure to deallocate the drive with deall mtd.
  2. Use Realtime commands for FITS files:
    First set the tape variable with setenv TAPE /dev/nrst0.

    For new tapes, init the tape as a FITS tape with inittape FITS
    (this also ``mounts'' the tape).

    If the tape already has data on it, use mounttape FITS

    Now you are ready to put some files on. A single file can be recorded with fitsarchive filenumber.

    An entire directory can be archived with dirarchive directoryname. The current directory is archived if none is given on the command line, thus you should be in the data directory before issuing this command.

    When finished, a listing may be gotten via fitsdumptape and the tape must be dismounted with dismounttape FITS
  3. An easy way to make a tar tape of either FITS or IRAF data is backup -dat for DAT or backup for exabyte, which will prompt you for any needed information. When extracted, a backup tape will create a subdirectory under your current directory with a name like ./ccd/flwo2/1994/07/20 and place all files there.

 (back arrow) To Table Of Contents


Purging Files

Eventually, you will need to remove your files from disk, either because you are running out of room, or your run is over. To check the data disk space, in the login window type ls -l /ccd, which whill produce an output like:
lrwxrwxrwx 1 root 14 Jan 13 1994 /ccd -> /data3/ccd/ccd
This shows that the /data3 disk holds the ccd data. Now type df /data3 which will produce output like:
    Filesystem     kbytes    used   avail capacity  Mounted on
    /dev/sd4c     1952573  720575 1036741    41%    /data3
and note the space available on data disk, for this example a gigabyte of storage remains.

The Iraf command to delete files is imdelete. Please use it for IRAF files. You may wish to edit the parameter file for imdelete (via epar imdelete) to turn on the safety measures.

Your data will be subject to deletion the afternoon following your last night of observing. You may want to check the data disk to see what garbage is left over from the previous observer. The command:

du -s /data*/{ccd,sonic}
(typed exactly as it appears) will list the subdirectories and the amount of used space in data.

Occasionally, someone will have left some images in FITS format. To erase them, see the section below on purging such files. Of particular use is the fpurgedir command.

 (back arrow) To Table Of Contents


Exiting (gracefully and otherwise)

You don't have to logout, but if you want to, first kill the Realtime system. Type exit twice in the Rtshell window, or use the alias bye. The windows will go away after a while. If you accidentally get out of the Realtime system (by typing a lot of CTRL-C's for instance), you can re-enter by typing gotccd . in the login window, which is the official way to bring up the system.

After exiting Realtime system, you can exit the computer by typing exit in the Main Login window

 (back arrow) To Table Of Contents


Disasters

If you get into bad trouble, for example the screen locks up on you and you get no response for several minutes, you will have to reboot the system. You may also have to do this to restart after being shutdown because of maintenance work or power problems.

There are three possible wyas to reboot:

  1. If you can still type commands into some window somewhere (ON FLWO48!) , type godown -r, which is a link into shutdown, and will flush all disk buffers to disk and shutdown as gracefully as possible.
  2. On the Sun console keyboard, press the `Stop' key in the upper left corner (also marked `L1') while simultaneously pressing the `a' key. This is also called `pressing L1/A' in some documentation. Possible file system corruption may occur, as disk buffers are NOT flushed.
  3. Turn flwo48's power off, wait 5 seconds, switch back on. The power switch is located on the back of flwo48's pizza box. Possible file system corruption may occur, as disk buffers are NOT flushed.
The number 1 method should always be attempted first, but if it won't work try 2, then 3.

After shutting down the machine via either of the first two methods, you reboot by typing a `b' at the `<' prompt. In the third case, the computer should reboot automatically without user intervention.

Within a few minutes, after a lot of messages, the login window should be back.

 (back arrow) To Table Of Contents


Useful UNIX Commands

(aliases are put in parentheses) (arguments inside [] are optional)

  ls -l[dirname]    (dir)   - lists the contents of a directory
  rm file          (del)   - deletes file
  mv file1 file2             - renames file1 to file2
  cp file1 file2              - copies file1 into file2
  cat file                  - lists the contents of a file
  lpr filename              - prints file named filename
  xterm &                 - creates another window 
  vi[filename]             - an editor
  emacs[filename]          - another editor
  cd directory             - change to directory directory
  mail                   - To read your mail
  mail name[@host.domain]  - To send mail to user 
  telnet [hostname]        - Connect to hostname
  rlogin hostname          - A better connect to hostname 
  ftp [hostname]          - remote file transfer program
Unix device names: Unix commands can be executed in the Rtshell window, but in general it is better to execute them in the login or other windows.

Remote logins and transfers via rlogin, telnet, or ftp can be done via the microwave link to Tucson. It is wise not to use the login window for these transactions.

 (back arrow) To Table Of Contents


Data Reduction in IRAF

It is possible to do the necessary debiasing and flatfielding of the CCD data in IRAF. The packages needed to do this (imred, ccdred) have to be loaded. A "translation" file called instru is in the observer directory, which is needed by ccdproc. You'll almost certainly want to check the parameter files of ccdred (do you want real output?), ccdproc (what do you want to do, check the bias overscan sizes, trim sizes), and the combining tasks (flatcombine etc.).

The pixel directory must be set by you, because the default directory (on the user disk) doesn't have room for an entire night's data. The simplest thing is to put the data in a subdirectory of the night's data, e.g., in IRAF do this:

cd /ccd/flwo2/1992/01/03
mkdir reduced
set imdir=/ccd/flwo2/1992/01/03/reduced/
Don't forget the final slash in the imdir command!

For accurate data reduction, it is recommended that you take 5 bias exposures, and more than 20 flatfield exposures in each filter with exposure times such that the level obtained is close to what the sky level will be for your object exposures (probably less than 1000 counts). For an example exposure time of 2 seconds, the latter is easily done via

goflat 2; repeat 19
Two header items need to be correct for the IRAF ccdred package to work properly. These are the keywords IMAGETYP and FILTER. For the bias frames, the IMAGETYP should be "zero". For the flatfield frames, the IMAGETYP should be "flat" and the FILTER keyword should be whatever is appropriate. For the object exposures, IMAGETYP should be "object" and the FILTER keyword should also be whatever is correct. These items can be checked via:
ccdlist *.imh
Any necessary changes can be made via:
hedit
You will first be prompted for a file name, which can be a wildcard name (e.g., data* will use all the frames named data001, data002 etc.).

Moving along now, do lpar ccdred, and make sure the file looks like this :

   (pixeltype = "real real")    Output and calc pixel datatypes
     (verbose = yes)            Print log info to the stdout?
     (logfile = "logfile")      Text log file
    (plotfile = "")             Log metacode plot file
      (backup = " ")            Backup directory or prefix
  (instrument = "ccddb$flwo/ccd.dat") CCD instrument file
      (ssfile = "subsets")      Subset translation file
    (graphics = "stdgraph")     Interactive graphics device
      (cursor = "")             Graphics cursor input
     (version = "2: October 1987")
       (flpar = no)             flush pfile on assign?
        (mode = "ql")
You have the option of making the output file pixeltype real if you are worried about precision. All Parameter files can be changed via epar filename. The editor is exited with CTRL-D.

If you have a number of flats or biases, you should use flatcombine or zerocombine on these. Enter epar flatcombine. I suggest you use the avsigclip technique on the flats, and maxreject on the biases to combine them, so as to get rid of cosmic rays. Leave the imagetyp equal to ``flat'', or ``zero'' as the case may be. For flatcombine, subsets should be used ("yes"). The great advantage of using IRAF is found here: To combine the flats, for instance, you need only type:

flatcombine data*.imh
for the case where "data" is the prefix for ALL of your files. The program will sort out the flats from the biases and objects, and then sort out the different filters among the flats. You will be left with combined flats with names like ``FlatV'', ``FlatR'', if the filters in the headers were V and R, for example.

The command

zerocombine data*.imh
does something similar to the bias frames, only combining those frames with IMAGETYP of ``zero''. The output file will be called ``Zero''.

There is also a command to combine dark images, obviously called

darkcombine data*.imh
Now do lpar ccdproc. The file should look like:
      images = " "        List of CCD images to correct
    (ccdtype = " ")       CCD image type to correct
  (max_cache = 0)         Max image cache mem (in Mbytes)
     (noproc = no)        List processing steps only?n
     (fixpix = no)        Fix bad CCD lines and columns?
   (overscan = yes)       Apply overscan strip correction?
       (trim = yes)       Trim the image?
    (zerocor =  no)       Apply zero level correction?
    (darkcor = no)        Apply dark count correction?
    (flatcor = yes)       Apply flat field correction?
   (illumcor = no)        Apply illumination correction?
  (fringecor = no)        Apply fringe correction?
    (readcor = no)        Convert ZERO to readout correction?
    (scancor = no)        Convert FLAT to scan correction?
   (readaxis = "line")    Read out axis (column|line)
    (fixfile = )          File for bad lines and columns
    (biassec = "[1030:1038,2:1023]") Overscan strip section
    (trimsec = "[1:1024,1:1024]") Trim data section
       (zero = "")        Zero level calibration image
       (dark = "")        Dark count calibration image
       (flat = "FlatB,FlatV,FlatR ")       Flat field images
      (illum = "")        Illumination correction images
     (fringe = "")        Fringe correction images
   (scantype = "shortscan")    Scan type (shortscan|longscan)
      (nscan = )          Number of short scan lines
(interactive = no)        Fit overscan interactively?
   (function = "legendre")     Fitting function
      (order = 1)         Num of polynomial terms/spline pieces
     (sample = "*")       Sample points to fit
   (naverage = 1)         Number of sample points to combine
   (niterate = 1)         Number of rejection iterations
  low_reject = 3.)        Low sigma rejection factor
(high_reject = 3.)        High sigma rejection factor
       (grow = 0.)        Rejection growing radius
       (mode = "ql")      
Pay particular attention to the biassec and trimsec, as these will obviously need to be changed for 2048x2048 images. darkcor should be turned on if you want to subtract darks, and the dark frame should be given in the appropriate row.

The combined bias frame for the thinned chip shows no structure, but if you still want to subtract off the bias frame change zerocor in the parameter file to ``yes'', and enter ``Zero'' (or whatever) for the zero file.

You may want to change the input files now for zero and flat in the ccdproc parameter file to be what you actually wound up with. These can also be entered on the IRAF command line.

You are now ready to process all of the flats. Type:

ccdproc Flat*.imh
This will first debias the flat frame(s) by calculating the overscan value, subtracting that value from the entire image, and then subtracting the ZeroS frame from the result. If the flats have zeroes anywhere, an error in division will occur when processing the object frames. In that case, correct the flats for the zeros by loading the IRAF package prototype, and using the command:
imreplace upper=n
where n is some value below the mean (found by imstat). You will be prompted for the file name and the replacement value, which could be anything but zero, but might as well be the mean value.

The file called subsets should have been modified or created and will look something like:

      'B'     B
      'V'     V
      'R'     R
This file is used to distinguish between the choices of flat fields to be used to flatten the object frames.

You are now ready to process all of the object data. Type ccdproc objects. You can also enter the bias and flatfield frames at this time via: ccdproc data.imh zero=zero flat=flat. If the bias or flats have not been processed, they will be at this time. One can also use files that contain the file names here, like: ccdproc @data zero=zero flat=@flats, where @data and @flats are text files with the actual file names to be used listed, one to a line.

NOTE: The reduced images are written over the raw images. Processing can be checked by:

ccdlist filenames
A useful command is flpr, which clears the processor should any errors have occurred along the line.

 (back arrow) To Table Of Contents


FITS Format

To record data in FITS format, issue the command ccd filetype fits in the Rtshell window. Using this format makes available other commands in the Rtshell window (basically duplicating what exists in IRAF). These are described in the Realtime manual of Bill Wyatt. Some of the more commonly used commands are:
dlink now moves you to the current data directory
dlink date moves you to the data directory of date
info n displays header of picture number n
oldcom [n] Change the header information on an existing FITS file. Selects an
editor from the value of the VISUAL or EDITOR shell variables, usually vi or mg. If you get the wrong editor, edit the file .cshrc in your home directory and change these variables.
purge n deletes data file n
dir lists data files in current data directory
view n brings up saoimage, with picture n. Also kills any previous saoimage.
rfile n reads picture n into the working buffer.
In the login window, you can be a lot more destructive with purging. You first have to go to the data directory via cd $datadir
Then, typing fpurge * will delete all files in the directory, but query each one.
You can also dlink to a month or year of the directory and type fpurgedir dirname, Example: in the directory /ccd/flwo2/1994 you can purge all the data taken in March, 1994 via:
dlink; dlink ../../1994; fpurgedir 03
To archive data, see the archive section on data storage.

 (back arrow) To Table Of Contents


Miscellaneous

The Rtshell window has an extensive help command, describing all of the commands listed above, plus those dealing with driftscanning, changing the readout pattern of the CCD and other things.

Several aliases have been written which readout the chip in popular ways; execute them in the Rtshell window:

ccd2048 - (size = 2048x2048 = full res) alias ``large''
ccd2048c - (full res, but only reads central 1024x1024; this speeds up the readout)
ccd1024 - (2x2 binning) alias ``small''
ccd512 - (4x4 binning)
ccd512c - (2x2 binning, but only read out central 512x512)
ccd256 - (8x8 binning)
ccd128 - (16x16 binning)
These last two are readout very fast, good for snapshots of fields.

 (back arrow) To Table Of Contents